America's Premium USENET Provider


Configuring Newsleecher with your Newsdemon.com Account
Step 1 – Once you have installed Newsleecher, double click on the icon that was created on your desktop or if you did not choose a shortcut to be installed, Click “Windows Start Button”, Click “All Programs” and find “Newsleecher” in your list of programs.
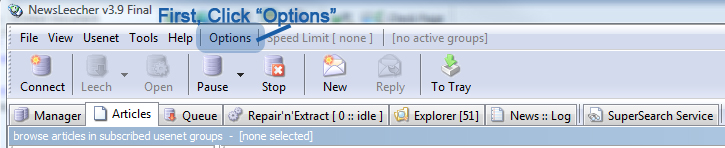
Step 2 – First, you will want to determine the directory where messages will be downloaded to. In order to do this, click on "Options" in the menu.
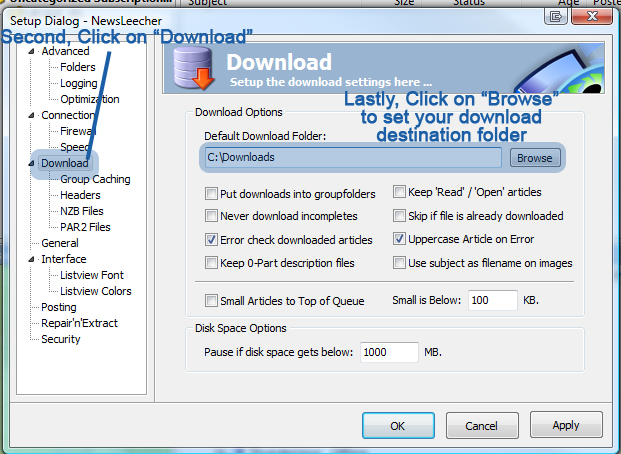
Step 3 – Next, click on "Download" in the new menu that pops up which is located on the left pane. You will see the menu on the right that will show the Download directory. Click on "Browse" to set a different directory than the default. Click "OK" when done.
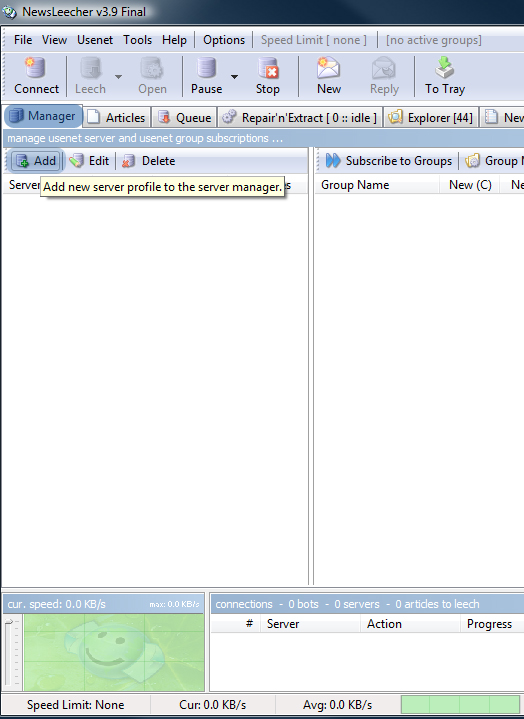
Step 4 – Now we will be configuring your Newsdemon.com account with Newsleecher. In oder to do this, click on the "Manager" tab and click "Add" to enter in your server information.
Step 6 – A new window will appear with the Server Setup section. Here, you will want to enter in your information that can be found in your Members Login area. The following are the Newsdemon Server Addresses that differ dependent on your account*:
Suggested server (GeoDNS load balanced to closest server to you):
- Hostname: news.newsdemon.com
- Ports (non-SSL): 119, 23, 443, 3128, 7000, 8000, 8080, 9000
- Ports (SSL): 563, 80, 81, 9119
Force NORTH AMERICAN server location:
- Hostname: us.newsdemon.com
- Ports (non-SSL): 119, 23, 443, 3128, 7000, 8000, 8080, 9000
- Ports (SSL): 563, 80, 81, 9119
Force EUROPEAN server location:
- Hostname: nl.newsdemon.com
- Ports (non-SSL): 119, 23, 443, 3128, 7000, 8000, 8080, 9000
- Ports (SSL): 563, 80, 81, 9119
Enter in the Server Address that is found in your members area under the "Server Address" field. Be sure to check the port available from Newsdemon matches that of the Port field.
*you can find the server information in your Login area, the confirmation email and/or the Newsdemon Ports page that was sent from Newsdemon. If you did not receive your information, contact NewsDemon Support
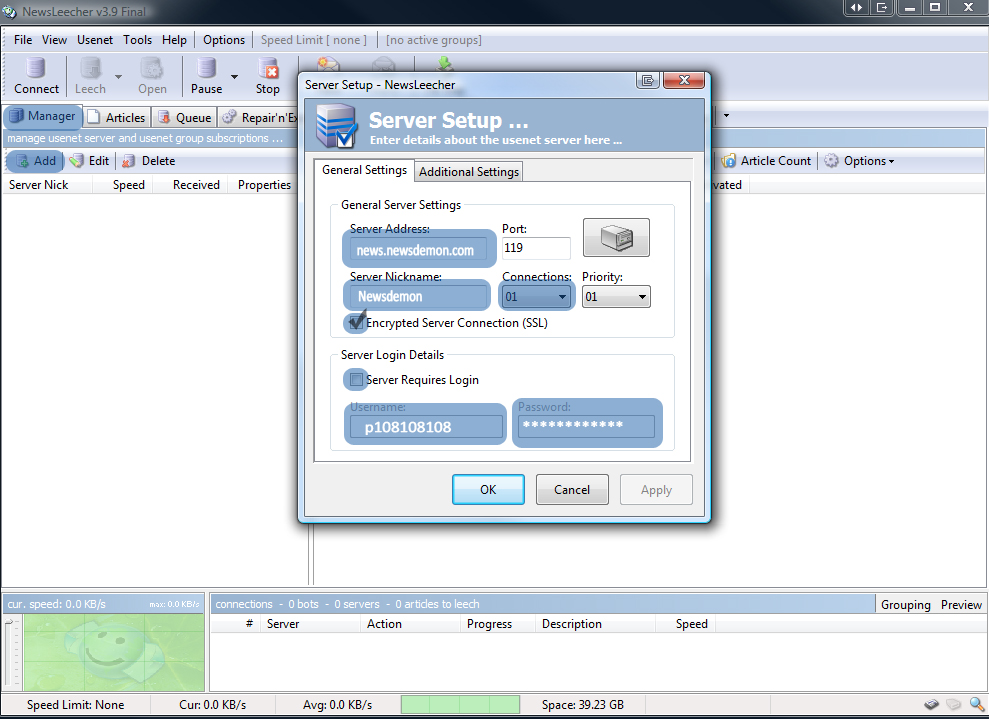
– Under "Server Nickname", type in "Newsdemon"
– Depending on the plan you have chosen, choose the correct amount of connections available with your Newsdemon account under connections drop down menu.
– Depending on the plan you have chosen, choose whether SSL is enabled on your account. If so, please check the Port and click on the checkbox by "Encrypted Sever Connection (SSL)"
– Using the confirmation email and/or your member login information, click the checkbox for the "Server Requires Login" section and enter your username and password here. Click "OK" when done.
Step 7 – After entering in your server information, you will see your Server on the Manager window. Now press "Connect" on the left side of the navigation bar. You will see on the bottom of the screen the server(s) trying to connect (the number of servers that are shown on the bottom are a reflection of how many connections you set in the previous step) Note: It may take up to 30 minutes for some accounts to become active.

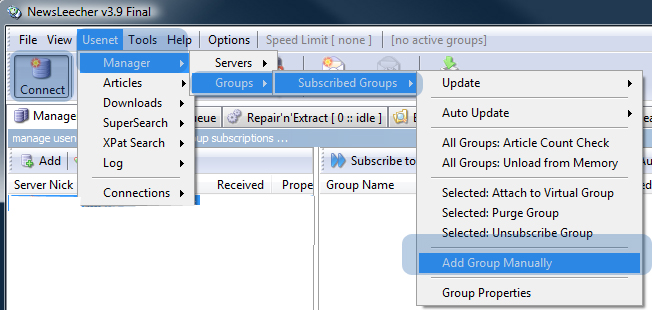
Step 8 – With the connections set, in order to add a newsgroup to subscribe to, click on "Usenet" at the very top of the menu, the hover over "Manger", then "Groups", then "Subscribed Groups", then "Add Group Manually"
Step 9 – Alternatively, you can click on the Articles tab, and right click on "Uncategorized Subscriptions" and click "Add Group Manually"

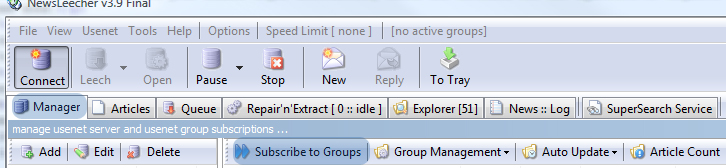
– If you do not know what the name of the Newsgroup is, go to the "Manager"" tab, click on "Subscribe"
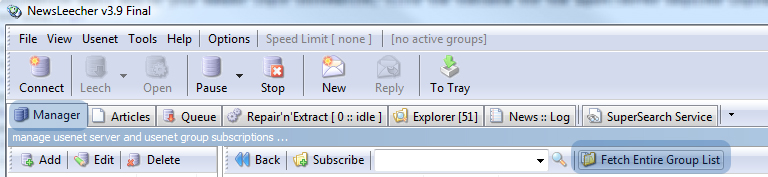
– Then click on "Fetch Entire Group List" to get all of the groups that are avaialable. Use the search field to search for groups by keyword. Double click on the Group to subscribe.
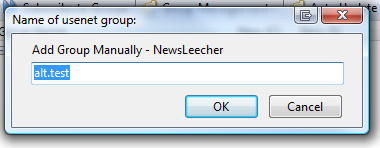
Step 10 – Enter in the Address of the group in the window and press "OK". As an example, we add "alt.test"
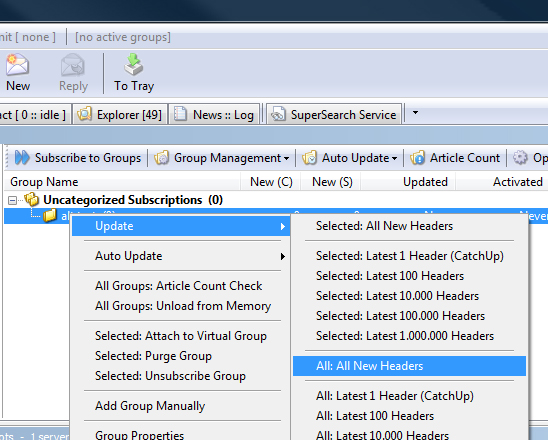
Step 11 – After adding the Address, go to the "Manager" tab if it is not already selected, and right click on the subscribed group and choose "Update" then "All New Headers" to download all of the headers of the newsgroup. You will see the status of the downloaded headers on the bottom screen.
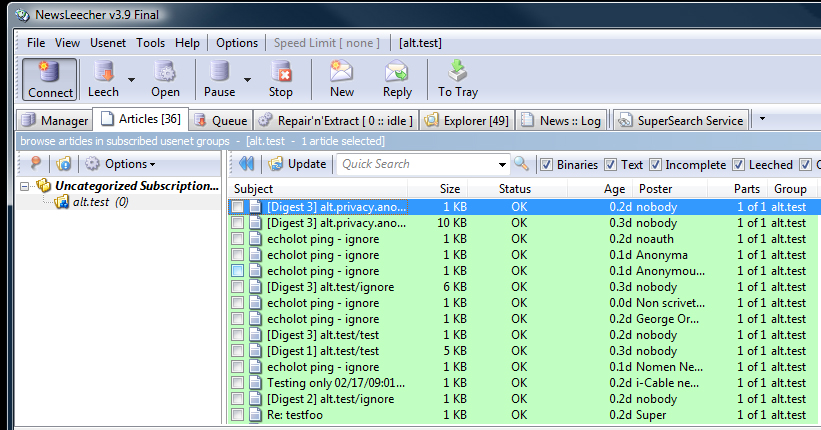
Step 12 – Click on the "Articles" tab and click on the subscribed newsgroup to see all headers.
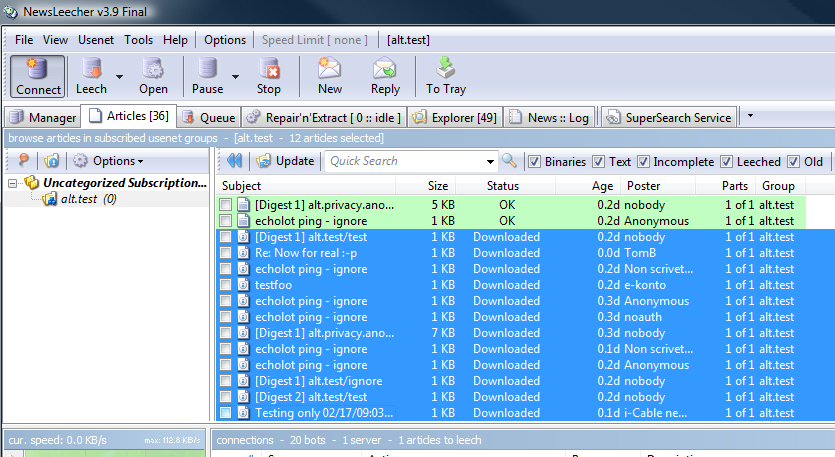
Step 13 – To download any of messages, either double click or select each checkbox for each message you desire to download. The messages will be downloaded to the folder that you had chosen at the beginning of this tutorial.
You're finished! Repeat these steps to add different newsgroups to subscribe to. For more options and help, you can also check out the "Help" menu on the navigation bar which offers a good variety of support.